Website Pages & Color Scheme #
The Website Pages & Color Scheme section allows you to fully personalize your company’s listing website to match your brand identity and business style.
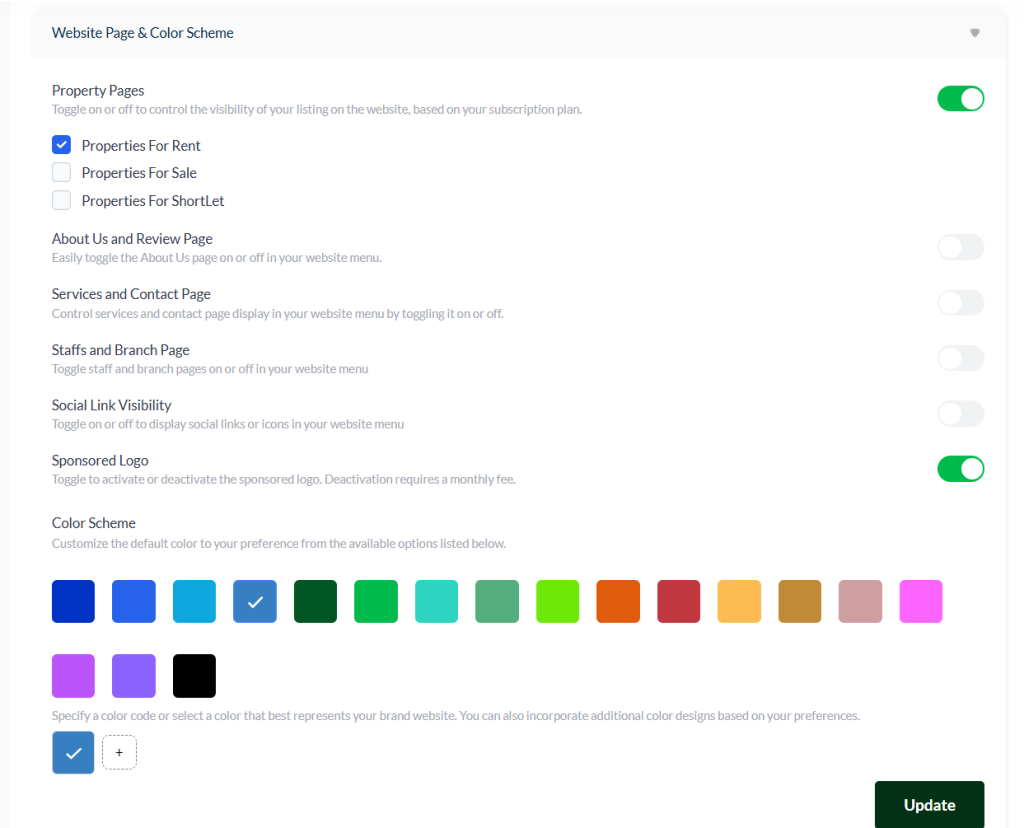
1. Website Pages Customization #
This feature gives you complete control over what sections appear on your company’s listing website.
How It Works #
- The Property Page section allows you to manage different menu items that appear on your website.
- You can turn off any section you don’t want to display using the toggle switch.
- To disable or enable specific menus (like “Featured Properties” or “Our Agents”), use the tick option to select which items stay visible.
💡 Tip: Use the toggle button to quickly enable or disable all menus at once, or use the checkboxes to customize specific areas.
🖼️ Recommended Visuals:
- Screenshot showing the Property Page menu with toggles and checkboxes.
- Example of a before/after view when some menu sections are turned off.
2. Color Scheme Personalization #
The Color Scheme section helps you set your company’s visual tone by applying your preferred color style across the website.
Steps to Customize Colors #
- Go to Settings → Website Pages & Color Scheme.
- Under the Color Scheme area, select from the available preset colors.
- To use your brand color, click the “+” icon and enter your hex color code (e.g., #2B7A78).
- You can also use the Color Template Toggle to adjust color combinations until they match your branding perfectly.
- Click Save or Update to apply the changes across your website immediately.
🎨 Pro Tip: Keep your color choices consistent with your logo and marketing materials for a strong, professional brand presence.
🖼️ Recommended Visuals:
- Screenshot of the color picker tool with the “+” icon visible.
- Example of a listing website before and after applying a new color scheme.
3. Why This Section Matters #
Customizing your website pages and color scheme helps you:
- Strengthen your brand consistency
- Present a clean, professional look to clients
Maintain control over what your audience sees
Saving and Applying Changes #
Any update or modification made to your company listing website settings may take 40 seconds to 3 minutes to reflect, depending on your browser and internet speed.
After making changes, allow a few moments before refreshing the page to see the updates take effect.
How to Save Changes #
- After editing any section, click the “Update” button to apply the changes across your company dashboard and website.
- Once the update is successful, a confirmation email will be sent to your registered company email address to acknowledge the change.
Important Note #
⚠️ Changes will not take effect until you click the Update button.
Always save after each edit to ensure your company information stays current and visible across the platform.


